Resin doesn’t come out of molds ready to shine. It needs smoothing, sanding, and polishing to be done without wrecking those sharp, satisfying edges that true dice lovers look forward to. The right approach to polishing cast resin dice means understanding how resin behaves, how abrasives work, and how different techniques (like dry tumbling or hand sanding) can either make or break your set. It’s about choosing the right tools, following the right steps, and knowing when to go slow—even when you’re dying to fast-forward to the shiny reveal.
This is the crossroads where chemistry meets craftsmanship. If you nail it, you’ll end up with dice so clear, so bright, and so perfectly faceted that they’ll look like treasures.
The Trouble with Casting Resin
Casting anything, especially resin, almost always leaves behind a rough finish. With dice, the challenge doubles: not only is the surface cloudy and rough, but you also have to avoid rounding those sharp, satisfying edges.
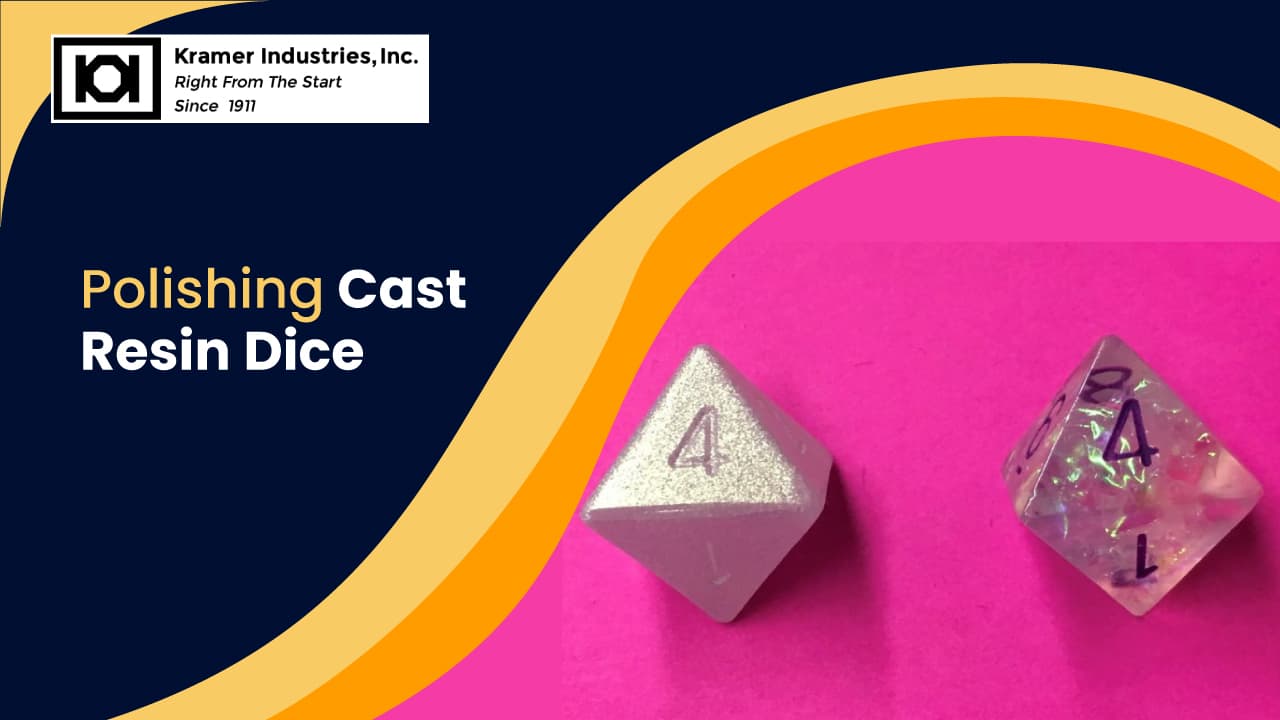
The dice straight out of the mold (like the sad little example on the left in the image you’re picturing) have zero clarity and feel like a disappointment. Tumbling with aggressive media can smooth them out, but at a terrible cost of rounded corners.
Polishing cast resin dice can be done the smart way using dry tumbling for surface smoothing without sacrificing the crisp geometry that makes dice so satisfying to hold.
The Dry Tumbling Approach
Dry tumbling gives you the best of both worlds of smoothing and polishing without excessive abrasion. It’s a slow and steady race where each step can take 12 to 24 hours. However, the reward is a dice set that’s clear, shiny, and sharp.
Step One
In this step, we use Hardwood Cubes with a Dry Abrasive Finishing Cream. This duo works in tandem for hours, creating a smooth matte surface, perfectly prepped for final polishing.
Step Two
Swap in regular Hardwood Media with Hi-Glos Final Finishing Cream, and you can watch the clarity emerge. The result is a dice that is glossy and clear.
This method of polishing cast resin dice is ideal for creators who want their work to be both precise and radiant.
Manual Polishing the Old-Fashioned Way
Maybe you like getting your hands dirty, or maybe you’re a perfectionist. Either way, hand-polishing dice can give you unbeatable control and a deeper appreciation for the craft. Here’s the step-by-step breakdown for polishing cast resin dice by hand.
Materials You’ll Need:
- 1000 grit sandpaper
- Polishing papers
- Nitrile gloves (resin dust isn’t your friend)
- A small cup of water
- Smooth, flat surface (like a glass pane)
- Paper towel
- Small paint brush
- Acrylic craft paint (your inner artist gets to shine)
Part One: Sanding
Sanding is like carving away the rough surfaces and leaving room for new ones.
- Wet the 1000 grit sandpaper a little to keep things smooth and dust down.
- Focus on the mold-marked faces of your die.
- Make small circles with the die, keeping its face flat against the sandpaper.
- Regularly check your progress to avoid lopsided dice.
- Once the major marks are removed, give your dice a good soapy rinse.
Part Two: Polishing
This is the phase when frosty click clacks turn shiny.
- Lay down the polishing paper on your surface.
- Wet the paper and repeat the gentle circular polishing motion.
- Progress from roughest to smoothest papers.
- Always rinse between steps to get rid of lingering abrasive dust.
By the time you’re through all the papers, you’ll barely recognize your dice—the clarity will be amazing.
Part Three: Inking
Inking is where you breathe soul into your dice. You’ll need:
- Acrylic craft paint (choose your color)
- A tiny brush
- Fresh water and a trusty paper towel
Dab paint into the numbers, wipe the excess, and repeat. If paint stubbornly clings where it shouldn’t, gently wipe it off with slightly damp paper. Your dice are now both art and artifact.
Pro Tips for Better Results
- Use nitrile gloves religiously to keep oils (and resin dust) off your skin.
- Rotate your dice carefully while sanding/polishing to avoid flat spots.
- Don’t rush through the polishing act. The beauty of polishing cast resin dice lies in patience.
Why Dry Tumbling Wins
If you want speed, it is best to do your tumbling wet. If you want crisp edges and that clear finish, dry tumbling is your route. Polishing cast resin dice through dry tumbling minimizes rounding, maximizes clarity, and brings out the true potential of your craft.
Conclusion
Polishing cast resin dice is a blend of science, art, and patience. From dry tumbling to hand polishing to a combination of both methods, each step you take brings you closer to perfection. With the right techniques, you can change cloudy resin blocks into shimmering, sharp-edged structures.
Ready to take your dice to the next level? Kramer Industries offers premium dry tumbling media, polishing creams, and expert advice tailored for creators like you. Whether you’re producing a handful of personal dice or launching a full product line, we have everything you need to master the art of polishing cast resin dice. Visit Kramer Industries today and start crafting your clearest, most brilliant dice yet!
Related Articles